Extending the Life of Technology: The Role of Memory Board Repair in Reducing E-Waste
When someone encounters any technical problems with their computer, such as not charging or turning on, their first instinct is to trash it and move on to a newer computer. Normally it is because it is too much trouble to get it fixed, or maybe they believe it is already outdated and therefore not salvable. What they don’t realize, is that most devices with common issues such as not charging or turning on still have a chance of being saved. Furthermore, without this chance, it may end up in a landfill where not only the materials inside the device are lost, but the toxic materials inside that device now harm the environment when not properly recycled. That’s why, ThinKTLS has hired a very talented engineer that specializes in extending the lifecycle of such devices.

We are excited to introduce Hjalamar Vargas, also known as J, as the newest addition to our engineering team!
His expertise is repairing the internal components of damaged devices. J started developing this skill at an early age by taking toys apart and figuring out how to put them back together. This skill has influenced his career as an engineer, now guiding the important work he does every day in our lab. We are thrilled to welcome him to our team, as he has already begun making such a meaningful impact on the lifecycle of every device that comes through our warehouse.
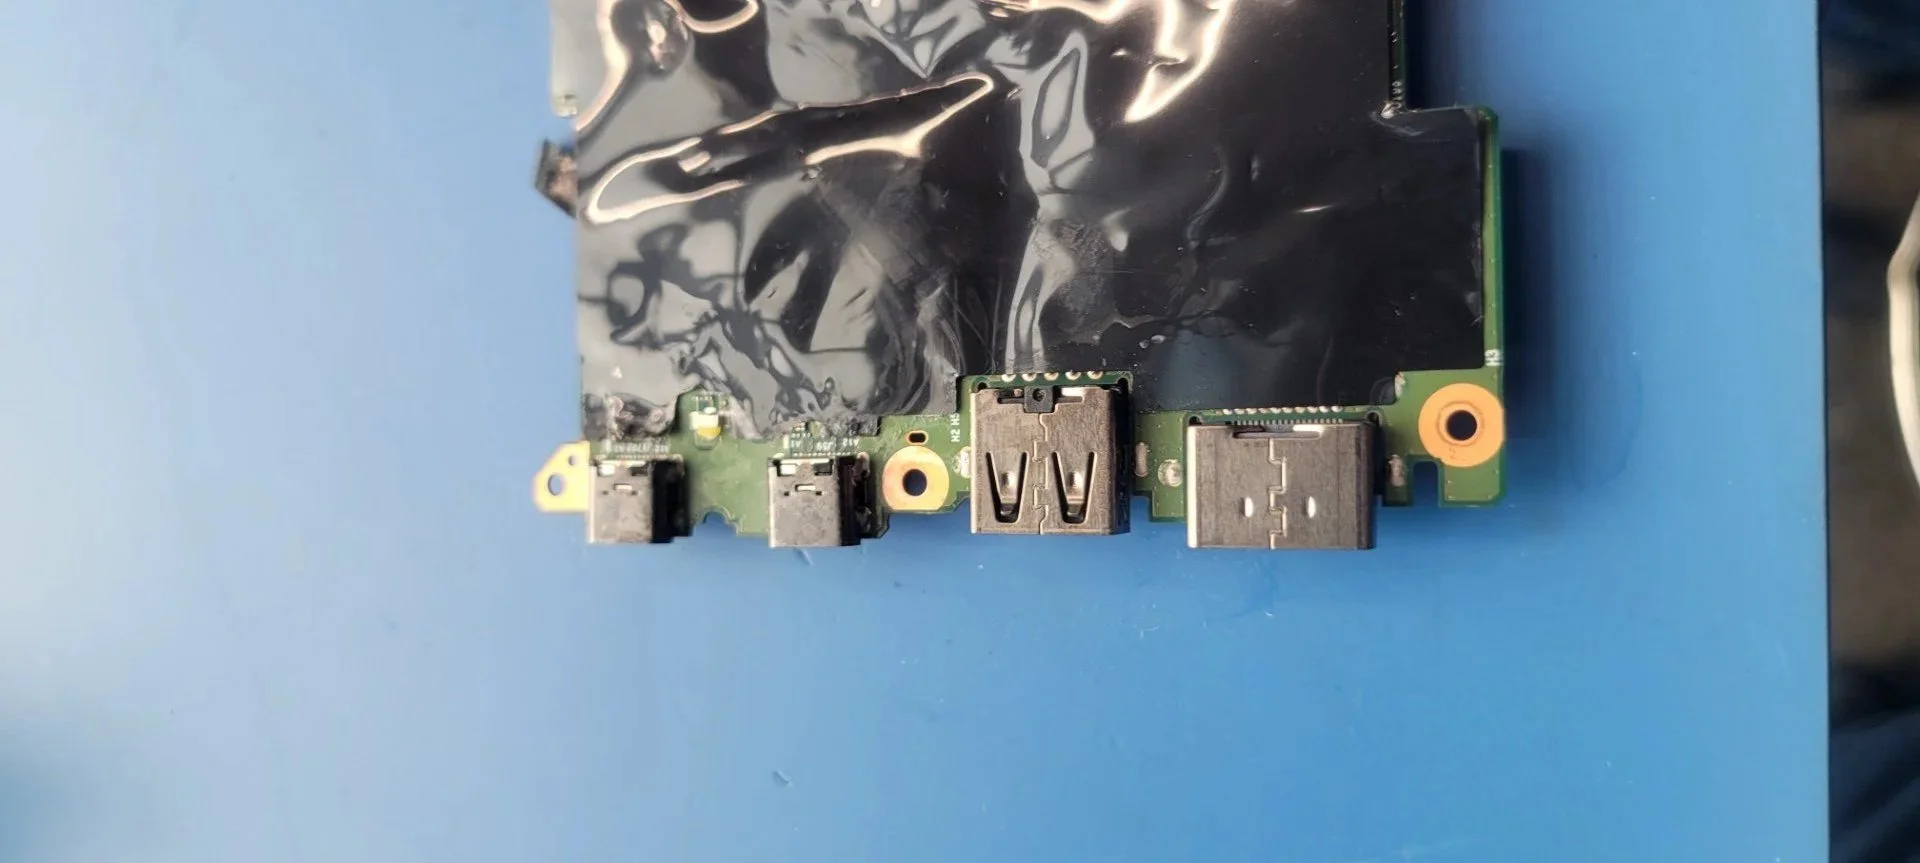
Recently, we documented J’s process on repairing a damaged circuit board. This particular circuit board was from the inside of a laptop that lost its charging functionality. At first glance, it may seem like end of this devices life. But, under the microscope he discovered the issue is not the device itself but that it had a damaged USB-C port. And with the right tools and precision, it can be repaired and put back into the market.
The Process:
J begins the repair by carefully positioning the circuit board underneath the microscope. At this scale, even the tiniest damaged pin can stop power from flowing through the device. Using precision tools and steady hands, J can identify the exact problem and restore the connection, bringing the device back to life. Let’s follow the steps below.
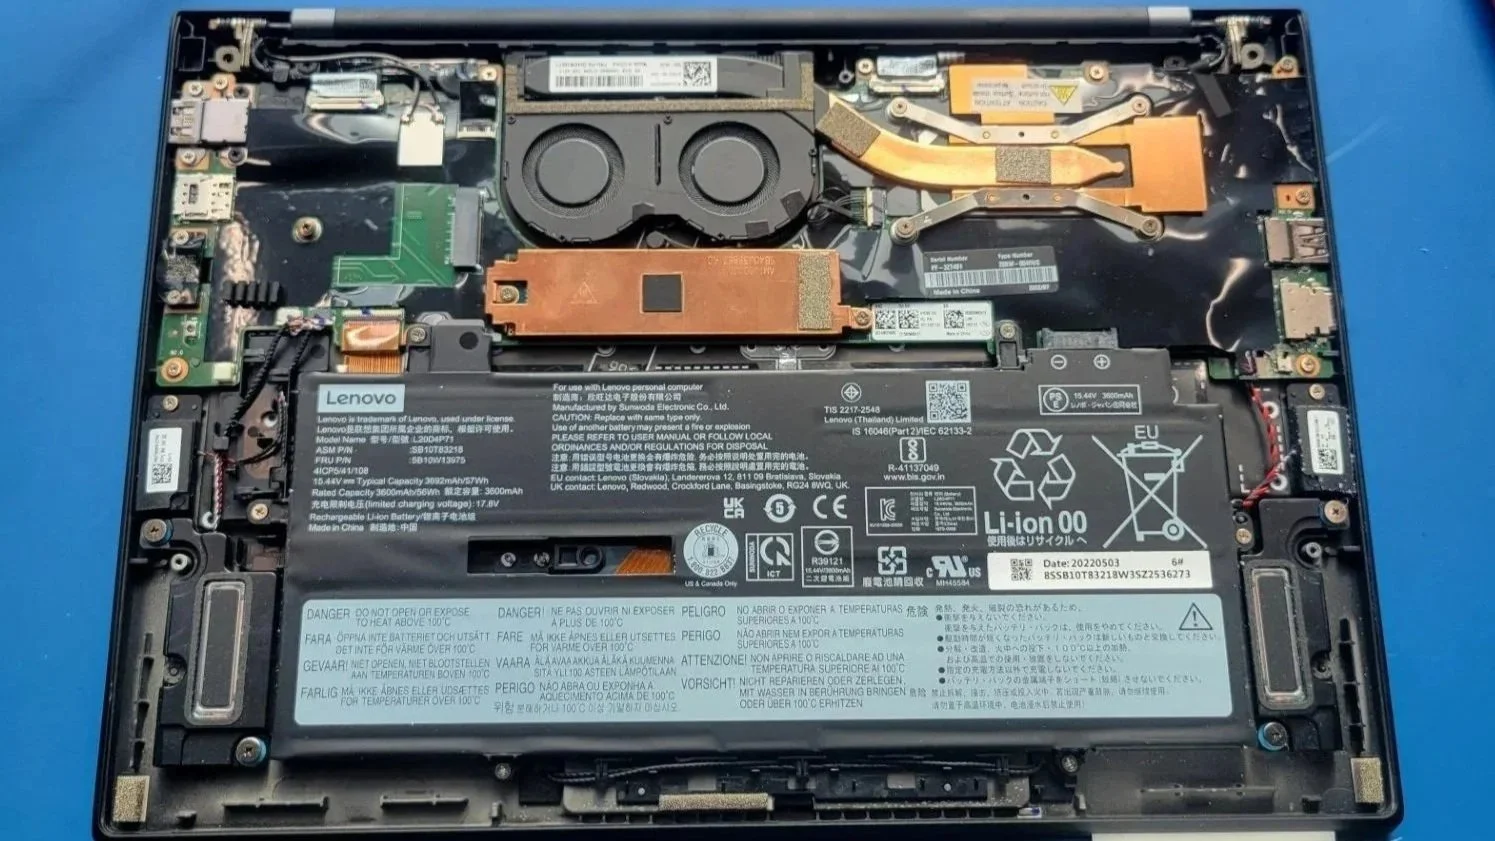
Step 1: Inspecting the damage
Before any repair begins, the circuit board is carefully examined under a microscope. A USB-C port contains multiple tiny pins responsible for power delivery, grounding and data transfer. Even a slight misalignment or broken connection can prevent the device from charging or communicating with other hardware.
Some common issues that can be inspected under the microscope can be:
Bent or broken pins inside the connector
Cracked or cold solder joints where the port attaches to the board
Lifted pads, where the copper contact has separated from the board
Debris or corrosion that may interrupt electrical contact
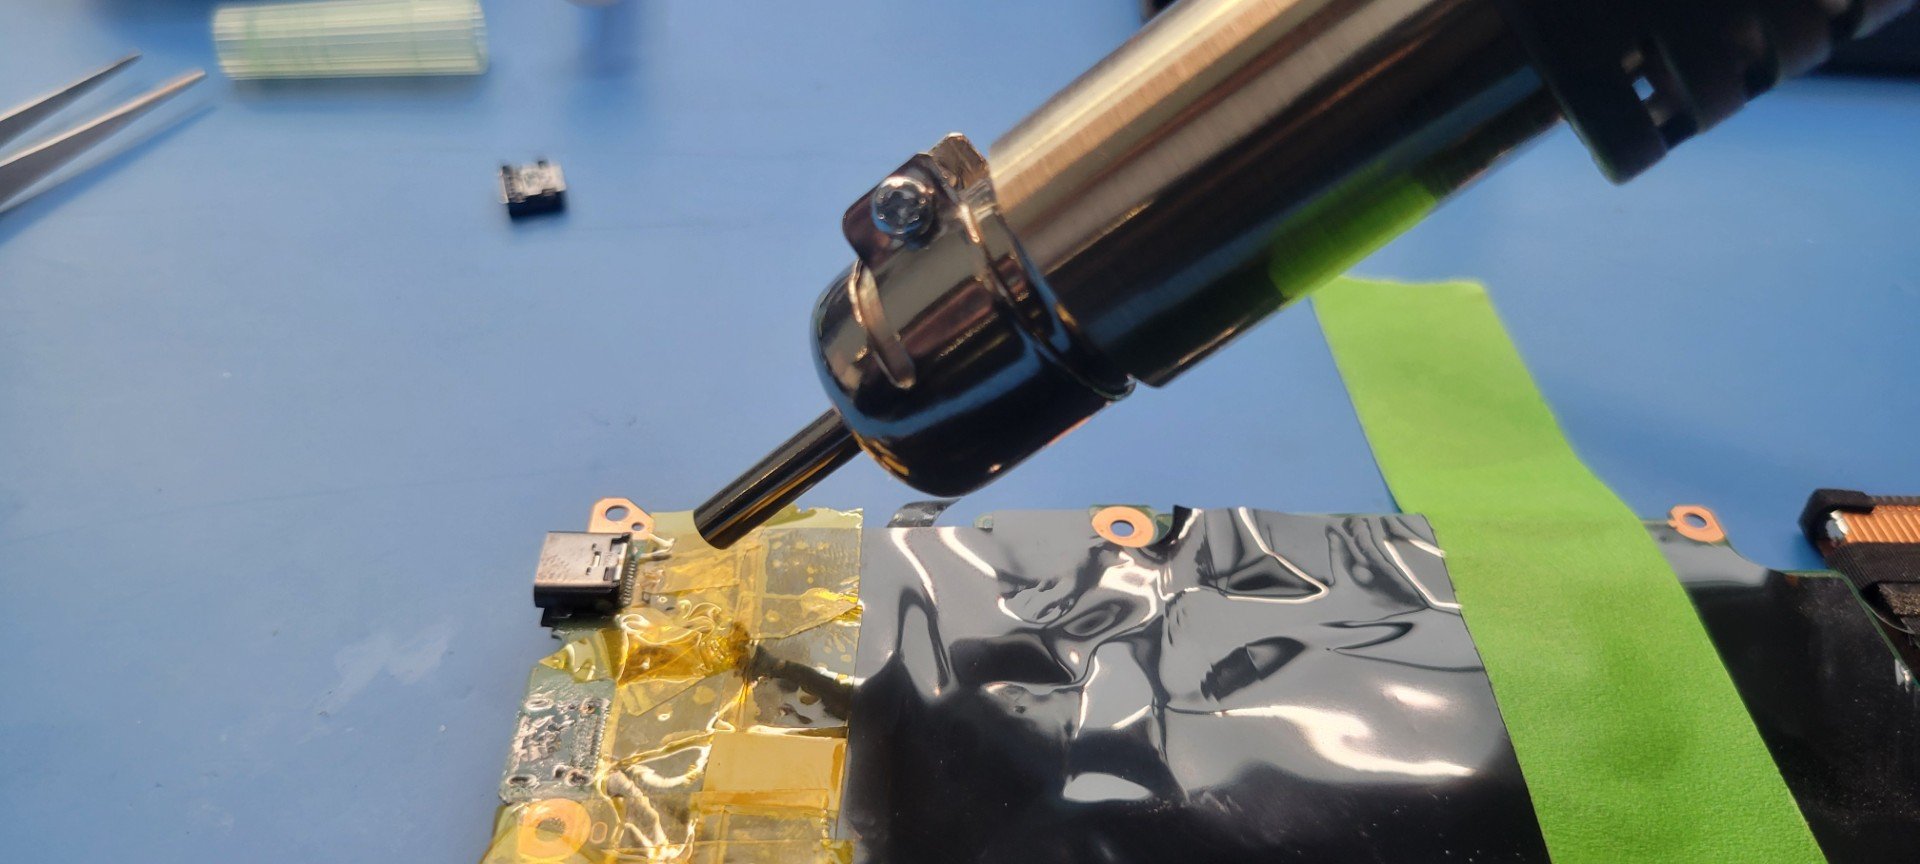
Step 2: Removing the damaged port
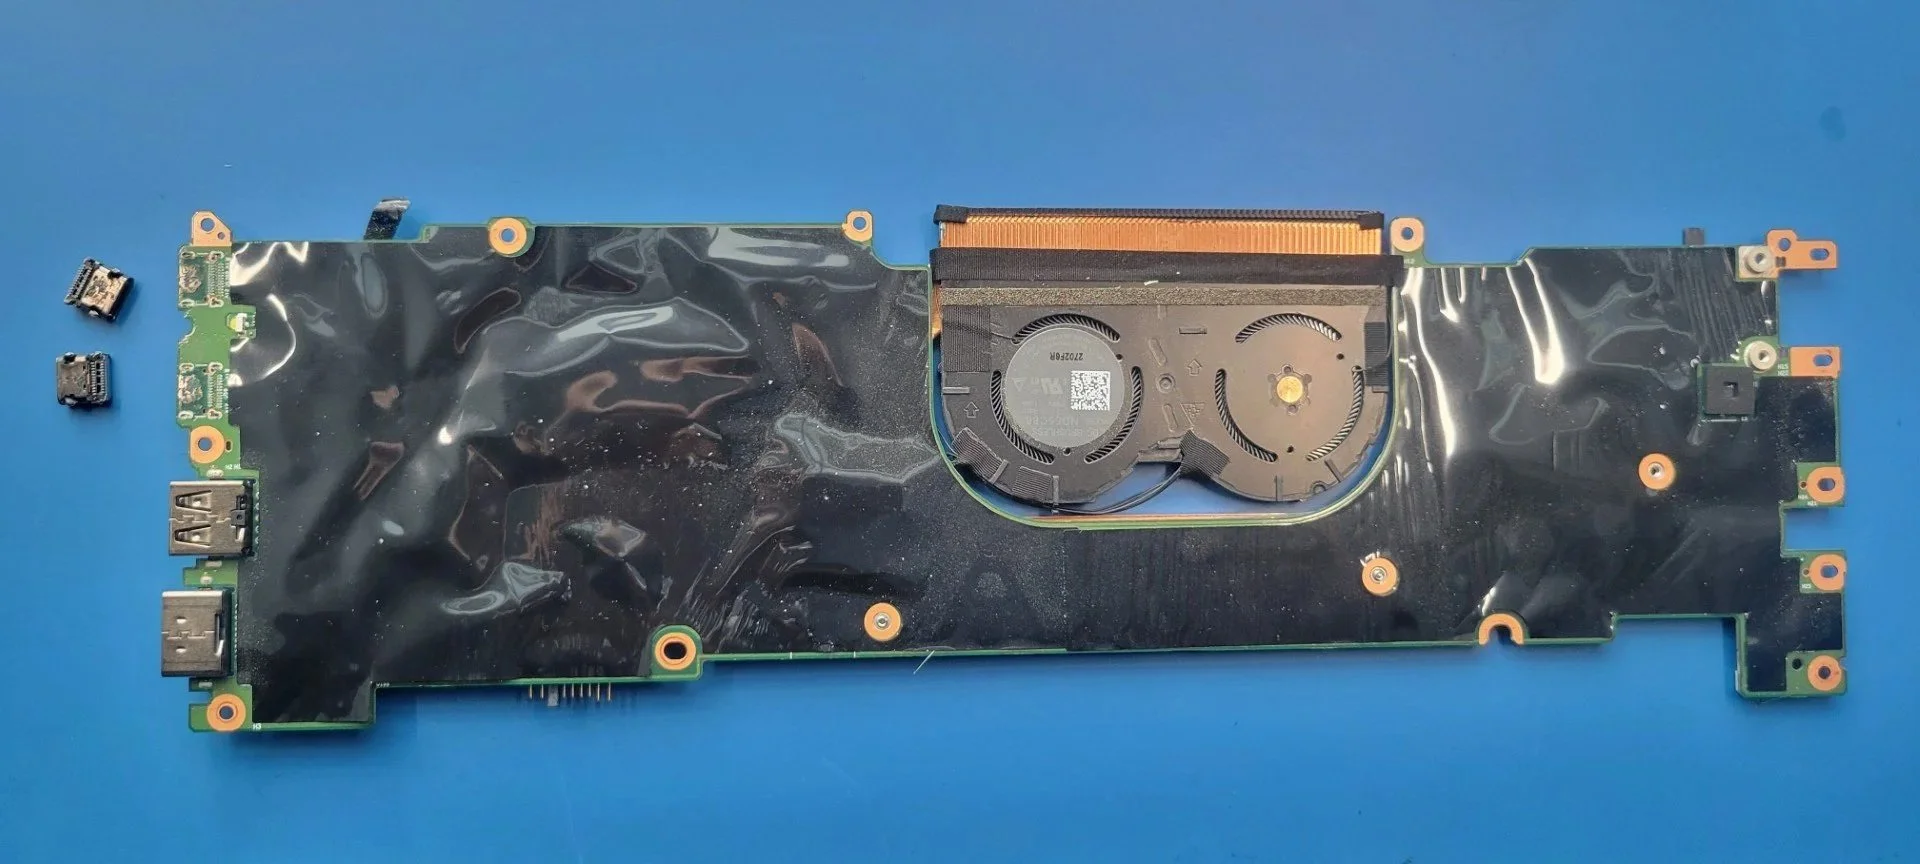
If the connector is beyond repair, it must be carefully removed from the board without disturbing surrounding components. J starts by removing the Printed Circuit Board (PCB) from the unit and begins the removal process of the damaged components. Engineers typically use a controlled hot air rework station, which directs heated air onto the solder joints holding the port in place. As the solder softens, precision tools such as fine-tip tweezers allow him to gently lift the connector away from the board.
Temperature control is crucial during this step to prevent damage to nearby components, board layers delamination, or pads detachment. Flux is often applied to help the solder flow more evenly and reduce stress on the board during removal.
Step 3: Board Preparation & ESD Protection
Before installation can take place, the board needs to be properly cleaned to ensure a reliable repair. Any leftover debris, dust, or residue from the removal process can interfere with how the new USB port sits and functions once installed.
In this step, J is preparing the board for cleaning by applying ESD tape. This helps protect sensitive components from electrostatic discharge and shields surrounding areas from exposure during the cleaning process. Taking the time to carefully prepare the board not only prevents potential damage but also ensures the new component can be installed securely and perform as intended.
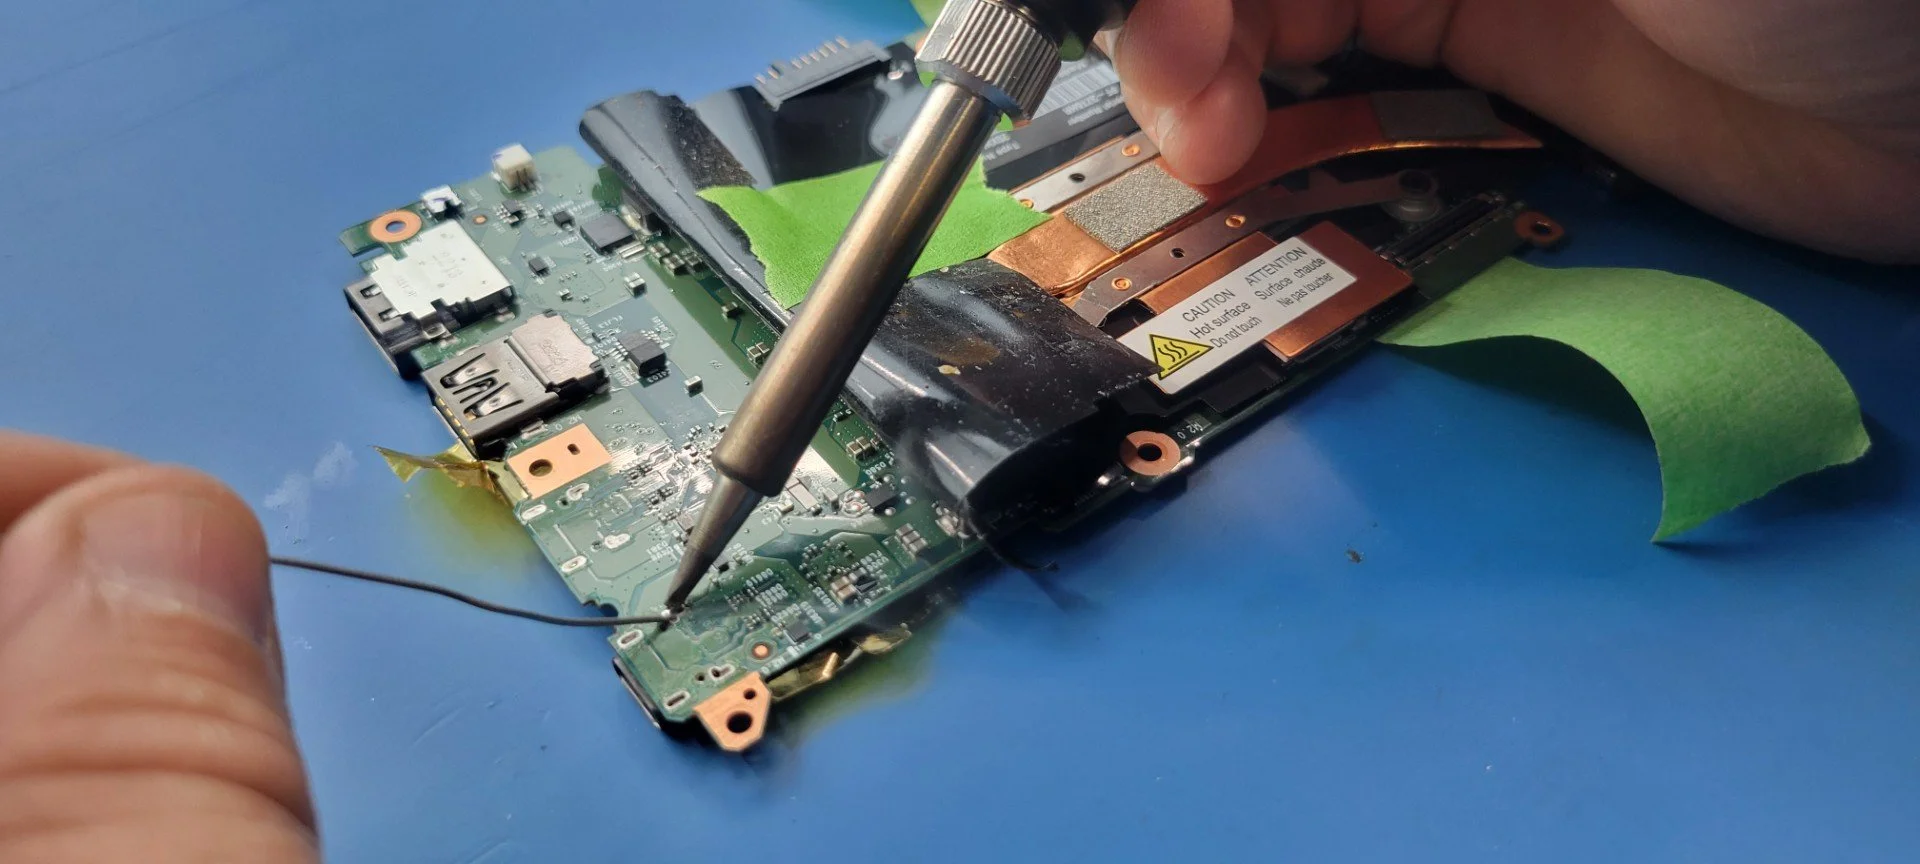
Step 4: Installing the New USB-C Port
After cleaning, J repositioned the board to complete solder joints on the USB-C connector casing. A replacement USB-C connector is carefully aligned with the original solder pads. Because the connector contains extremely fine contact pins, even a slight misalignment can cause connection failures. J secures the port in place and apply solder to the pins and mounting labs. Under magnification, each connection is inspected to ensure: proper solder flow, no solder bridges between adjacent pins, and strong mechanical attachment to the board. Using precision soldering tools, he forms clean, reliable connections that restore both power delivery and data communication.
Step 5: Opposite Side Connector Soldering
With the primary side complete, the board is repositioned again to access the opposite side of the USB-C connector. J repeats the soldering process to secure all remaining connection points, ensuring the port is fully anchored and electrically connected from both sides.

Step 5: Testing the repair
Once the new port is installed, the device undergoes functional testing to confirm the repair was successful. Engineers verify functions:
Charging capability, ensuring the device receives power correctly
Data transfer, confirming the port communicates with connected devices
Physical stability, checking that the connector is securely mounted
Voltage and continuity checks, verifying proper electrical flow is across the board
If a device passes these tests, the repair is considered complete, and it is ready to return to service.
Overall impact:
While a damaged port may seem like a minor issue, replacing it at the component level can prevent an entire device from being discarded. Precision repairs like this not only restore full functionality, but also extend the life of critical technology, reduce electronic waste, and recover valuable components. By repairing rather than replacing, engineers help protect sensitive data, lower costs and contribute to more sustainable technology practices. Every small repair plays a big role in keeping devices, and the data they hold, safe and operational.
Interested in seeing a process like this in action? Check out our recent video on LinkedIn by clicking here.